Showing posts with label crochet. Show all posts

September 10, 2020

Kuya Matthew Is Into Crochet Too


Yes, you read it right. Our Kuya is now into crochet na din.
Mom & Dad Crochet,hobbies,crochet,kids,

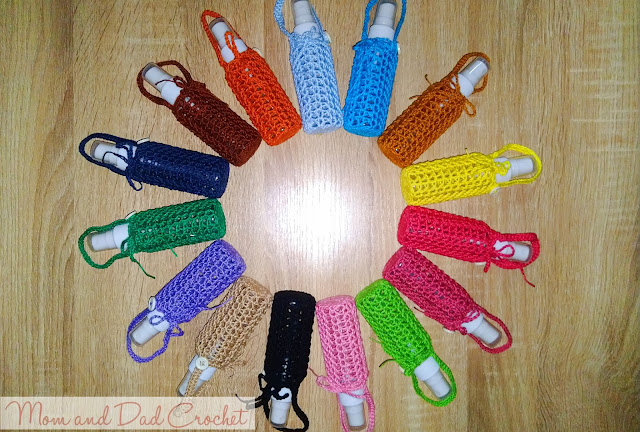
The other night, while we are doing these crochet spray bottle holders.

Mom & Dad Crochet, crochet,

We told Matthew to return in crocheting and he can earn extra if his projects will be sold in our online shop.

We also told him that this can be his past time while staying at home rather than spending his day in front of a laptop and tablet.

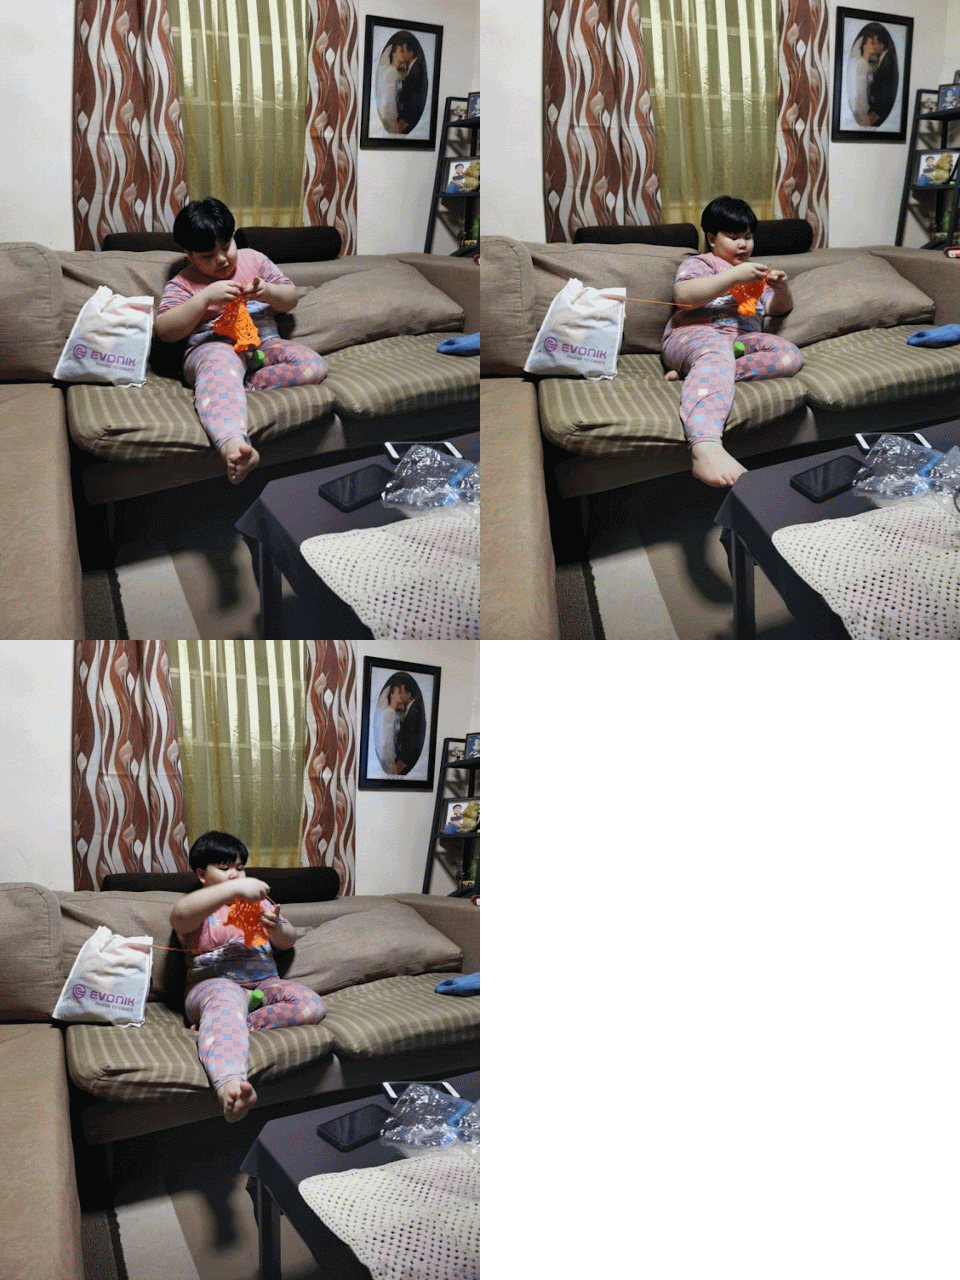
Here he is doing his crochet project at home after having lunch. The photo is taken using the Mi Home Security Camera 360°.
Mom & Dad Crochet,hobbies,crochet,kids,

Without hesitation, he asked the hook and yarn.

Of course, he needs to learn first the basics. Mommy already taught him how to hold the yarn and grip the hook and doing chains. 

This time, I instructed him to do the double crochet, single crochet, and slip stitch. These stitches will be used in making the centerpiece project for Matthew.

Mom & Dad Crochet, crochet,

Once his project is finished, I will post the free pattern in Mom and Dad Crochet which according to Matthew, will be changed to Family Crochet. Bright idea, di ba?

After the centerpiece, he will do a Santa Hat naman daw for him and his soon-to-be baby brother. How sweet.

Here is his short clip doing the crochet.

Mom & Dad Crochet, crochet,


How about your kids, what are their past time these days?

Read More »

June 10, 2020

Crochet Items from Mom and Dad Crochet


Most of us are looking for extra income aside from salary. What would be the best passive income that can we have while staying or working from home?

One advice that Mommy and I can give is to use your passion as a source of income.

Just like what we are doing. We are selling made-to-order crochet items like booties, headbands, hats, sandals, and many more.

Here are what we made a recently.


These hats is one of the best-sellers made to order in our shoppe. Now that we don't have made-to-order yet, I am making more of these with several sizes.
crochet, Mickey Mouse hat, Minnie Mouse hat, crochet made to order, momayeshoppe, Mom & Dad Crochet, crochet, DIY, free crochet pattern, crochet pattern,

Minnie Mouse Headband
Mom & Dad Crochet, crochet headband, Minnie Mouse,momayeshoppe, Mom & Dad Crochet, crochet, DIY, free crochet pattern, crochet pattern, crochet made to order,  crochet minnie mouse headband,

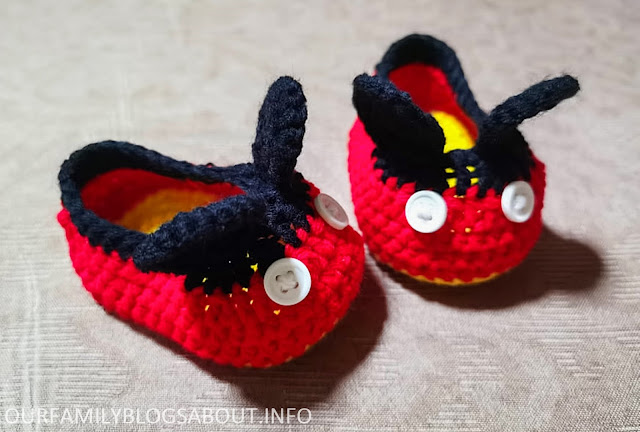
A Pair of Mickey Mouse Shoes
Another most-ordered item is this mickey mouse shoes. Mommy is the one doing this naman.
momayeshoppe, Mom & Dad Crochet, crochet, DIY, free crochet pattern, crochet pattern, crochet made to order,

Different Sandals
This sandals has an interchangeable flowers.
momayeshoppe, Mom & Dad Crochet, crochet, DIY, free crochet pattern, crochet pattern, crochet made to order,

While this off-white sandals with daisy flower details is another of the best-sellers. I will try to make a pattern of this one and share it soon. 
momayeshoppe, Mom & Dad Crochet, crochet, DIY, free crochet pattern, crochet pattern, crochet made to order,

We also make sandals for boys like this one.
momayeshoppe, Mom & Dad Crochet, crochet, DIY, free crochet pattern, crochet pattern, crochet made to order,

Miniature Hats
We finished 100 pieces of miniature hats. There are 14 color of these. 
momayeshoppe, Mom & Dad Crochet, crochet, DIY, free crochet pattern, crochet pattern, crochet made to order,

The buyer is happy and satisfied when she received these hats. She even requested us to make one that will fit her.

If your wish to order and check other designs, you can visit and message us at momayeshoppe at Shopee or Mom and Dad Crochet at Facebok
Read More »

October 1, 2015

On Learning A New Craft


Since we have less crochet made to orders now, I take this chance as a break and make other craft projects like this,


and this one.


Aside from my craft projects for 2015, I am learning a new craft. I am starting to make grosgrain bows like this pinwheel bow that can be attached to a soft band, headband or clips.

A photo posted by Maye Domencil (@mommymaye) on

I also plan to work on felt cloth and in fact, I already made a Facebook page for it. I will share it soon once I have posts on it. For now, I am collecting ideas and will share tutorials real soon, which will be shared here. Just need to buy craft tools. I am so excited! Please do watch out for it.

Have a great day!
Read More »

June 1, 2015

Crochet White Doll Booties and Headband Set

It's been a while since I shared our crochet projects here. So let share this cute set of white doll booties and headband set.

Crochet White Doll Booties and Headband set
Attached to the booties and headband are crochet rose flower.
Read More »

May 4, 2015

First Crochet Centerpiece

One day, somebody asked us if we can make a crochet rag. She sent us the photo which looks like this:

Photo sent by an inquiring customer

I tried browsing the net if there are available pattern but I cannot find such pattern one for this. I just take a closer look on the photo and tried to make a miniature version using cotton yarn.
Read More »

March 31, 2015

Crochet Minion Diaper Cover, Hat and Boots Set

Missin' our crochet projects?

Here are our latest MTO, crochet Minion diaper cover, hat and boots set.

Crochet Minion Diaper Cover, Hat and Boots Set

Read More »

March 16, 2015

Reading Crochet Symbol Chart

I’ve been into crocheting for more than two years now. There are times I can figure how to do it by simply looking at the photo samples. However, if I were to rate myself, I am still 8 out of 10. I still search for patterns online especially for the items very new to me.

Some patterns are in diagram form instead of text ones. So the problem arises because I cannot read such diagrams.

Then I saw this chart:

Crochet Symbol (DMC)
Read More »

February 23, 2015

Little Iron Man Amigurumi

Little Iron Man Amigurumi
I promised Matt that I will make an Iron Man crochet item since it was one of his favorites. I was thinking of making a hat but Mommy asked me to make a little amigurumi so it will be hung on his bag. Mommy had already made an Iron Man mask for him. 

Some might be asking what is an amigurumi?

"Amigurumi (crocheted or knitted stuffed toy) is the Japanese art of knitting or crocheting small stuffed animals and anthropomorphic creatures. The word is derived from a combination of the Japanese words ami, meaning crocheted or knitted, andnuigurumi, meaning stuffed doll. Amigurumi are typically animals, but can include artistic renderings or inanimate objects endowed with anthropomorphic features, as is typical in Japanese culture." (Wikipedia)
Read More »

February 13, 2015

Crochet Rose Flower

Hello everyone! Valentine's day is almost here. Let me share with you the crochet rose flower I made last night. 

Crochet Rose Flower
Read More »

January 15, 2015

Crochet Mini Booties, Chucks and Boots


Hello guys! It's been a while since I have posted about our crochet made to orders. Last December, I planned not to accept crochet made to order anymore. But because of the long days of break (I thought), I can accept this one bulk orders of 400 booties lang naman. I did accept because I still have a month to meet the deadline that is today, January 15. 

Read More »

November 14, 2014

Two Beautiful Years of Crocheting and Counting

Last September, our crocheting business has turned two. I actually can't remember when was the exact date we started to accept crochet made to orders. But based on the photo uploaded on Momaye's Shoppe, the very first photo we uploaded under MTO album was on September 21, 2012.

Read More »

September 12, 2014

Crochet McQueen Car Hat (with some variation)


Yes, it's another crochet McQueen Car hat (one of our bestseller hats) with a some variation (and addition).

Crochet McQueen Hat
Read More »

August 29, 2014

Latest Crochet Creations and more...

Hi everyone!

It's been a long while but I know Daddy Allan always fill your eyes with yummy foods right? Now let me share our latest crochet creations so please keep your eyes wide open :)


Read More »

July 12, 2014

Crochet Pacifier Souvenir

It's been a while since I posted about our crochet creations here. Like always, I have been so busy with my everyday duties. Thanks to Daddy A for keeping our family blog alive through his yummy recipes and amazing photos (you owe me one on this dear, hehe).

Now let me share our latest crochet creation that will definitely make your party be remembered.

Crochet Pacifier Souvenir
Read More »

May 15, 2014

Crochet Newborn Set

It's been a LONG while since I post about our crochet MTOs. Finally, I have this time to post about our latest creation.

This is our over cute crochet newborn set.

Crochet Newborn Set
Read More »

March 22, 2014

Crochet Converse Blue and Red/White Striped

Happy Friday! Let me show the crochet converse booties I made.

Crochet Converse Blue and Red/White Striped
Read More »

March 12, 2014

Crochet Soccer Ball Hat Pattern

crochet, crochet hat, crochet soccer ball hat, crochet soccer ball hat pattern, free crochet pattern, Mom & Dad Crochet,
Crochet Soccer Ball Hat
Here is the pattern for the soccer ball. I made modifications on the pattern to end up the desired head circumference asked by one of our customers.

You will need:
Hook – size 5
Black light worsted yarn
White worsted yarn
Red or any shade you want light worsted yarn
Tapestry needle for weaving


5 pieces hexagon
For the hexagon, use white yarn and do 5 pieces.
Round 1. Ch4, 11dc on the first chain, sl-st on top of chain 4 (you will now have 12dc).
Round 2. Ch3, 3dc on the same st as ch3, *dc on the next st, 4 dc on the next st. Repeat * 5 more times. Sl-st on top of ch3.
Round 3. Ch3, dc on the same st as ch3, dc on the next 3 sts, *4dc on the next st, *dc on the next 4 sts. Repeat * 5 more times. Sl-st on top of ch3. Fasten off.

Note: the 4dc in group in round 3 should fall between in between 2nd and 3rd dc of the 4dc group of round 2.

5 pieces hexagon and 6 pieces pentagon
For the pentagon, use black yarn and do 6 pieces.
Round 1. Ch4, 9dc on the first chain, sl-st on top of chain 4 (you will now have 10dc).
Round 2. Ch3, 3dc on the same st as ch3, *dc on the next st, 4 dc on the next st. Repeat * 4 more times. Sl-st on top of ch3.
Round 3. Ch3, dc on the same st as ch3, dc on the next 3 sts, *4dc on the next st, *dc on the next 4 sts. Repeat * 4 more times. Sl-st on top of ch3. Fasten off.

5 pieces half-hexagon
For the half-hexagon, use white yarn and do 5 pieces.
Round 1. Ch4, 6dc on the first chain, (you will now have 7dc).
Round 2. Ch3,turn, 2dc on the same st as ch3, dc on the next st, 4 dc on the next st, dc on the next st, 4dc on the next st, dc on the next st, 2dc on the last st (top of ch4 on the previous round).
Round 3. Ch3, dc on the same st as ch3, dc on the next 3 sts, 4dc on the next st, dc on the next 4 sts, 4dc on the next st, dc on the next 4 sts. 2dc on the last st. Fasten off.

Thru slip-stitch, attach one side of the hexagon to the pentagon, then attach the adjacent sides of the hexagon. Now, attach the other 5 pentagons in between hexagons. See below.

Pentagon and hexagon attached

This time, attach the half hexagon in between pentagons. See below.


Top view
Inside view
Now you have a semi-soccer ball. To make the next step easier, weave the loose yarns using tapestry needle first.

DC round1. Attach the white yarn at any part, ch3, make dc in each st or space all around. Sl-st on top of ch3.
DC round 2: Ch3, dc in each st around. Sl-st on top of ch3 and fasten off.
DC round 3: Attach the red or any yarn color of your choice on the sl-st of the previous round. Ch3, dc around, sl-st on top of ch3.
DC round 4. Ch3, dc in each st around. Sl-st on top of ch3
DC round 5. Ch3, dc in each st around. Sl-st on top of ch3. Fasten off.
DC round 6. Attach the black yarn on the sl-st of the previous round. Ch3, dc around, sl-st on top of ch3.
DC round 7. Ch3, dc in each st around. Sl-st on top of ch3
DC round 8. Ch3, dc in each st around. Sl-st on top of ch3. Fasten off.


For the ear flap and braids.
From the sl-st of DC round 8, count 12 stitches to the left. Attach black yarn and make ch3.
Round 1. Dc2tog on the next 2 sts, dc on the next 13 sts, dc2tog on the next 2 sts.
Round 2. Ch3, turn. Dc2tog on the same sts as ch3 and the next st, dc on the next sts until only 2 sts remained, dc2tog on these last 2 sts.
Succeeding rounds. Repeat round 2 until only single dc2tog on the last round.

Do edging thru sc around the earflap. 

Do this on the opposite side.

Using the three colors of yarn used (black, white and the color of your choice), connect the group of yarns and make a braid with your desired length.


Feel free to copy the pattern and enjoy crocheting.
crochet, crochet hat, crochet soccer ball hat, crochet soccer ball hat pattern, free crochet pattern, Mom & Dad Crochet,
Top view of the finished product
Read More »

February 21, 2014

Crochet Hello Kitty Booties

Today, I will share with you the long overdue pattern for our Crochet Hello Kitty Booties. But let me remind you that I am no expert in writing crochet pattern so please bear with me.

Crochet Hello Kitty Booties

You will need:

Hook size 3.5mm
Worsted Light Weight Yarns (color of your choice you need for the booties and hello kitty face)
Pearl Buttons
Tapestry needle

Finished booties length is approximate 4.5" for the following pattern.

How to crochet:


Booties:

R1. Ch18. 2sc in 2nd ch from hook. Sc in next 6 chs, hdc in next 4 chs, dc in next 5 chs. 6dc in last ch. Working along opposite side of row. Dc in next 5 sts, hdc in next 4 sts, sc in next 6 sts. 2sc in the same st as 1st 2sc. Join with sl st.

R2. Ch2. Hdc in the same st as ch2. Hdc in next 16sts. 2hdc in next sts, hdc in next 2 sts, 2hdc in next 2sts, hdc in next 16sts. 2hdc in last st. Join with sl st.

R3. Ch2. Hdc in same st as ch2. 2hdc in next 2 sts, hdc in next 15 sts, 2hdc in next 4 sts, hdc in next 2 sts, 2hdc in next 4 sts, hdc in next 15 sts. 2hdc in last 2 sts. Join with sl st.

R4. Working in back loop only. Ch2. Hdc in same st and around until last st. Join with sl st.

R5-6. Work in both loop. Ch2. Hdc in same st and around until last st. Join with sl st.

R7. Ch2. Hdc in same st as ch2. hdc in next 22 sts, dc2tog, dc in next 12 sts, dc2tog, hdc in next 19 sts. Join with sl st.

R8. Ch2. Hdc in same st as ch2, hdc in next 5 sts, hdc2tog, hdc in next 15 sts, hdc2tog, hdc in next st, dc2tog 4x, hdc in next st, hdc2tog, hdc in next 13 sts. Hdc2tog, hdc in next 4 sts. Join with sl st.

R9. Ch2. Hdc in same st as ch2. Hdc in next 22 sts, dc2tog 4x, hdc in next 17 sts. Join with sl st.

R10. Ch1. Sc in same st as ch1. Sc in next 21 sts, hdc2tog 4x, sc in next 14 sts. Join with sl st. Fasten off.
Make 2 pieces.

Right Strap:

R1. From the center back (with booties facing you). Count 12 sts to the left and sl st to that st. Ch2. Hdc (to the left right back to the center) in the next 24 sts. Ch2, turn.

R2. Hdc back until the the top of Ch2 in R1.Ch16, hdc in the 3rd ch from hook down until the 1st ch of Ch16.

R3. Do not turn. Sc in last hdc of R2 back to the 1st hdc of R2 and 2 sc (as edging) down the last hdc in R1. Sl st to the st next to the last hdc in R1. Fasten off.

Now, we need to do hdc to the the other side of the strap (the Ch16 that we did in R2). Start in the st next to where you sl st in R1. Sl st on that st and do the 2 sc (as edging) up (make it the same like you did in R3 down). Hdc in the free stitches of the Ch16 in R2 up until the last st. Ch4, sl st to the other side to form a ring. Ch1, turn and make 4sc into the ring. Join with sl st. Fasten off.

Left Strap:

R1. From the center back (with booties facing you). Count 12 sts to the right and sl st to that st. Ch2. Hdc (to the left back to the center) in the next 24 sts. Ch2, turn.

R2. Hdc back until the the top of Ch2 in R1.Ch16, hdc in the 3rd ch from hook down until the 1st ch of Ch16. (in this case the free stitched will be on top). 2 sc (as edging) down the last hdc in R1

Now, we also need to do hdc to the the other side of the strap (the Ch16 that we did in R2). Start in the st next to where you sl st in R1. Sl st on that st and do the 2 sc (as edging) up (make it the same like you did in R2 down). Sc in the 1st hdc until the last hdc in R2. Hdc in the 1st free st up until the last st. Ch4, sl st to the other side to form a ring. Ch1, turn and make 4sc into the ring. Join with sl st. Fasten off.

Weave all ends. Sew the buttons at each side of the booties.

I know it sounds a little bit confusing. This is the reason why it took me this long to post this pattern. Haha…

Hello Kitty Face:

R1. Ch8. sc 2nd ch from the hook, sc in the next 5 sts, 3sc last st. Now working on the other side, sc in next 5 sts, 2 sc in last st, sl st.

R2. Ch1. 2sc in the same st, sc next in the next 5 sts, 2sc in the next 3s st, sc next 5 sts, 2sc in the last 2 sts, sl st.

R3. Ch1. 2sc in the same st, sc next in the next 7 sts, 2sc in the next 4s st, sc next 7 sts, 2sc in the last 3 sts, sl st.

R4. Ch1. sc in the same st, sc next in the next 8 sts, (2sc in the next st, sc in the next st)2x, (sc in the next st, 2sc in the next st)2x, sc next 7 sts, (2sc in the next st, sc in the next st)2x, sc in the next st, 2sc in the last st, sl st.

R5. Ch1. sc in the same st, 2sc in the next st, sc next in the next 9 sts, (2sc in the next st, sc in the next 2 sts)3x, 2sc in the next st, sc next 9 sts, 2sc in the next st, sc in the next 2 sts)2x, 2sc in the next st, sc in the last st, sl st.

R6. Ch1. sc next in the next 13 sts, Join with sl st. Fasten off.

For the ears. Count two stitches down the Ch1 in R6. Sl st to that st. Ch1. Sc in next st, hdc in next st, 2dc in next st, hdc in next, sc in the next 9 sts, hdc in next, 3dc in next st, and sc in the next st. Join with sl st. Fasten off.

Make 2 pieces. Weave all ends.

For the bow, you may use the crochet bow pattern here. Use smaller size of hook then sew. Make two small bows and sew one on ear part of the face.

Sew the eyes, mustache and nose of the hello kitty using black yarn for the eyes and yellow yarn for the nose. Use tapestry needle for sewing and weaving.

You may sew the face on the booties toe top. I usually glue the face. I just glue first felt cloth under the face to make it look harder, and then glue them on the top toe of the booties.

Crochet Candy Pink Hello Kitty Booties

By the way, you can also make Hello Kitty Booties with black face.

Crochet Pink Hello Kitty Booties with black face
I did it! I thought I will never post this pattern. I hope you understand this. Feel free to leave a comment in case there’s a part you don't understand or you want to correct.

Happy crocheting and enjoy your weekend everyone!
Read More »